Demo AD Site and Subnet (Note)
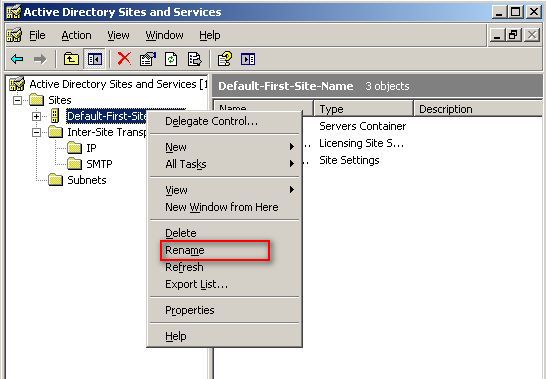
1.首先更改Default-First-Site-Name名字,這裡使用SiteA(圖1)
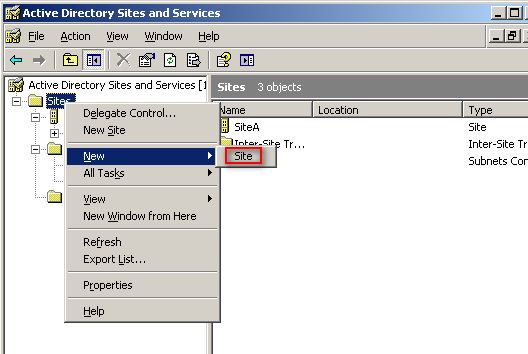
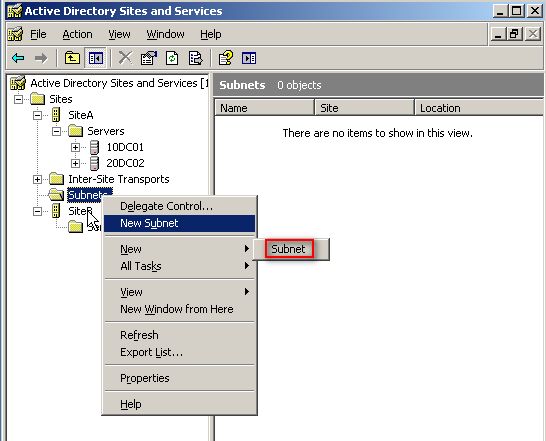
2.在site節點新增site,這裡共新增2個兩 (圖2)
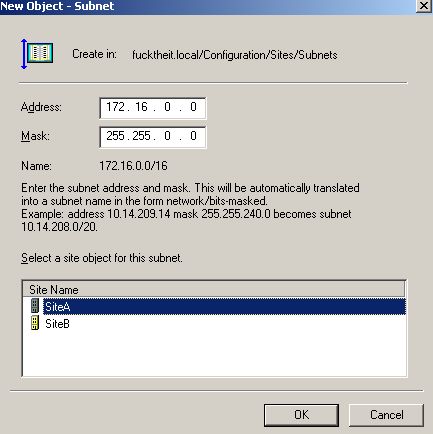
3.在subnet新增subnet, 要新增所有subnet, 這裡新增172.16.0.0/16 與10.1.0.0/16 (圖3,4)
4.在10.1.0.0 subnet上添加額外DC (注要指向DNS Server) (圖5,6,7)
4.1 因為我另一台準備成為DC的主機為R2,在使用dcpromo時出現failure,查看原因為schema問題(http://support.microsoft.com/kb/917385/zh-cn) , 然後在schema master的主機上執行extend ,然後再以正常手法安裝DC,成功安裝(圖8,9,10,11)
5.安裝完成後,一定要檢查DNS設定, 例如name servers, Zone Transfers還有SRV,GC記錄
(圖1)
 (圖2)
(圖2)
 (圖3,4)
 (圖5,6,7,)
(圖8,9,10)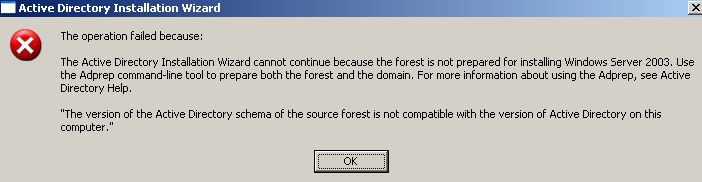

下圖為在schema master的主機上執行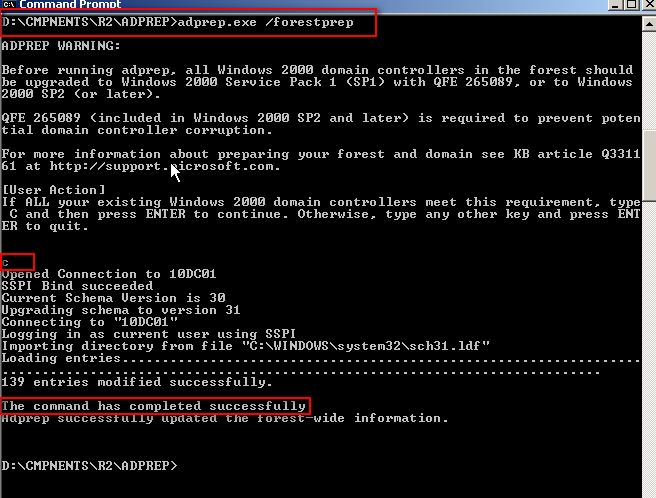

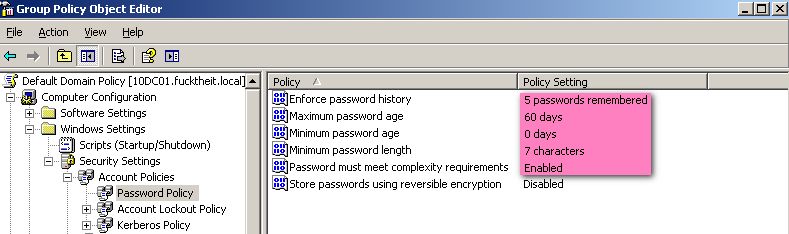
Demo GPO Local Policy (audit Policy) and software 限制
1.設用戶登入audit (圖1)
2.設管理用戶audit (圖1)
Note:管理用戶包括A user account or group is created, changed, or deleted, A user account is renamed, disabled, or enabled, A password is set or changed.
3.限制軟件訪問 , 測試calc 和 regeidt (圖2,3)
4.使用regeidt 默認enable remote desktop
Computer Configuration > Administrative Templates > Network > Network Connections > Windows Firewall > Domain Profile > Windows Firewall: Allow Remote Exception (圖4)
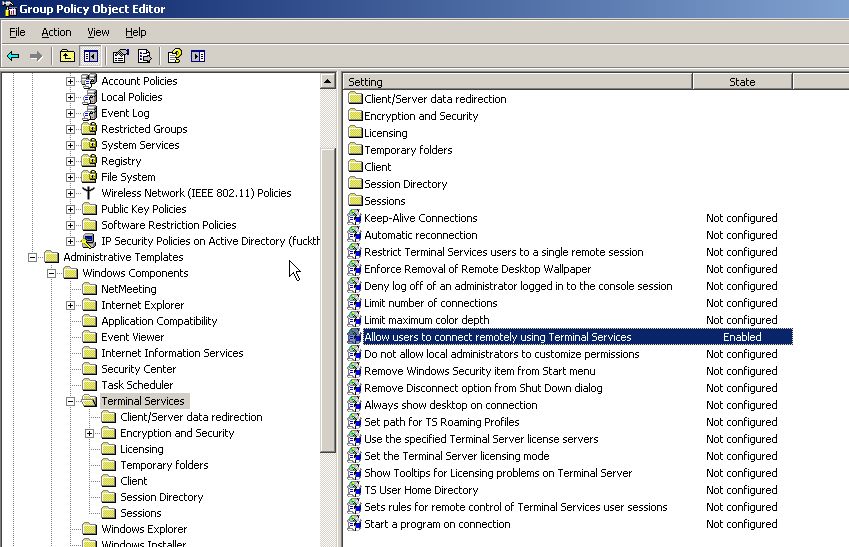
Computer Configuration > Administrative Templates > Windows Components > Terminal Services > Allow users to connect remotely using Terminal Services (圖5)
MACHINE\SYSTEM\CurrentControlSet\Control\Terminal Server
圖1

圖2
軟件限制,首給自己留後路,在enforcement上要configure all user.
圖3
圖4

圖5
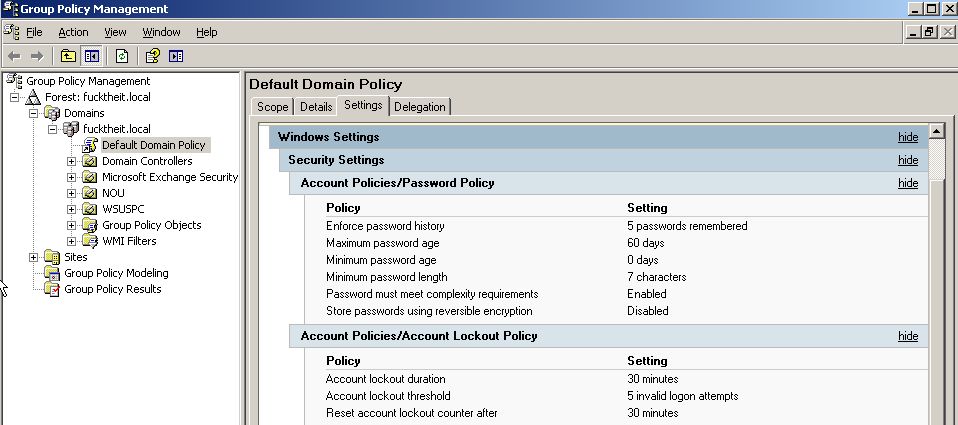
AD 安裝後确認 (Note)
1. 查看 Internet Protocol (TCP/IP) propertire --> 檢查DNS是否正確 (若是127.0.0.1 的話,最好重指定到本機IP)
2. 查看DNS , 如下圖會出現 _msdcs.domainname (_msdcs.fucktheit.local) 和 domain (fucktheit.local) 兩個folder, 上4 下6. (其中 _msdcs.fucktheit.local 區域是因為在AD安裝時順便安裝DNS所產生,它是專供其他DC來注冊用的)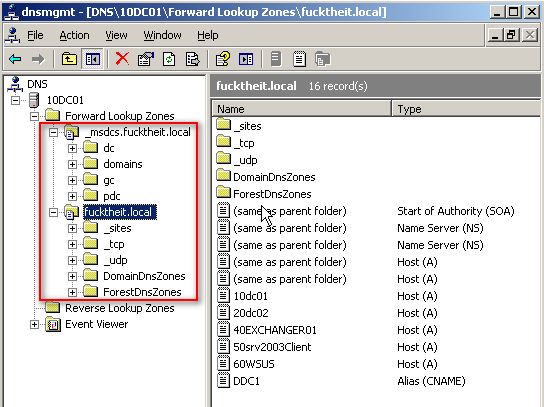 2.檢查SRV 記錄 ( _gc, _kerberos, _kpasswd, _ldap ) , 圖中因為已有一台DC2 join進了domain
 3.檢查 Default-First-Site-Name, 默認會有_gc, _kerberos, _ldap
 4.ping 自己的DC, DNS Server Name. 查看DNS是否工作正常.
5.使用net share 查看是否有將該share的文件share出來.
6.完善password保存, 尤其還原模式管理員密碼.
7.在evnet view會出現dicectory service, DNS Service, File Replication Service. 如果出現erro就會仔細檢查
4.ping 自己的DC, DNS Server Name. 查看DNS是否工作正常.
5.使用net share 查看是否有將該share的文件share出來.
6.完善password保存, 尤其還原模式管理員密碼.
7.在evnet view會出現dicectory service, DNS Service, File Replication Service. 如果出現erro就會仔細檢查 8.當需要排錯時,以下方法可以有幫助:
8.1 ipconfig /registerdns (重新手動登記,必須在dns設定允許)
8.當需要排錯時,以下方法可以有幫助:
8.1 ipconfig /registerdns (重新手動登記,必須在dns設定允許) 8.2重新啓動net logon service
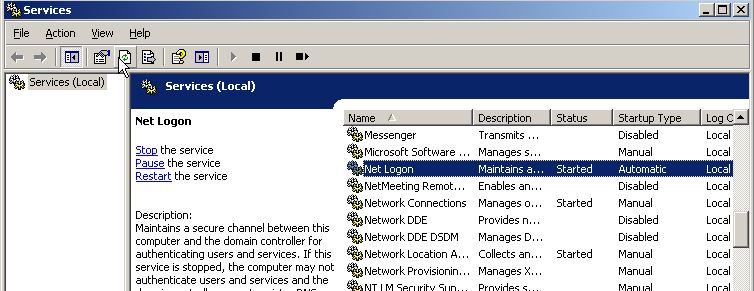
WSUS Notes (筆記)
Ref:
Step-by-Step Guide to Migrating from Software Update Services to Windows Server Update Services 2.0
Deploying Microsoft Windows Server Update Services 2.0
Updating Windows Vista Beta 2 Computers
1.安裝WSUS所必須軟件(本試在windowsServer2003)
The following software is required for running WSUS on Windows Server 2003:
· Microsoft Internet Information Services (IIS) 6.0. For instruction about how to install IIS, see Install and Configure IIS.
· Background Intelligent Transfer Service (BITS) 2.0; go to the Download Center at http://go.microsoft.com/fwlink/?LinkId=47251.
· Microsoft .NET Framework 1.1 Service Pack 1 for Windows Server 2003; go to the Download Center at http://go.microsoft.com/fwlink/?LinkId=35326.
An alternative is to go to Windows Update at http://go.microsoft.com/fwlink/?linkid=47370 and scan for Critical Updates and Service Packs. Install Microsoft .NET Framework 1.1 Service Pack 1 for Windows Server 2003.
2.安裝時使用默認選項(使用http 80 port)
3.安裝完成後,在client使用GPO. 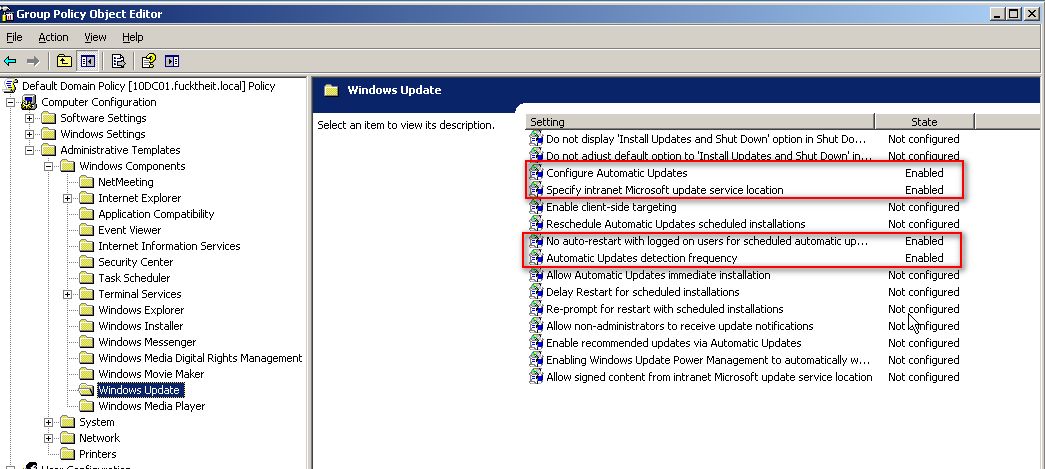 Note: 當Enable client-side targeting 沒有指定時,在WSUS將顯示為Unassigned Computer, 可先在WSUS建立NEW COMPUTER GROUP 然後在這項上指定.
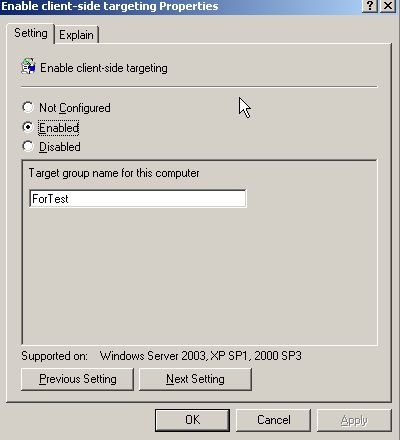
 在Specify intranet microsoft update service location 上只要打上http://servername:port 就可以
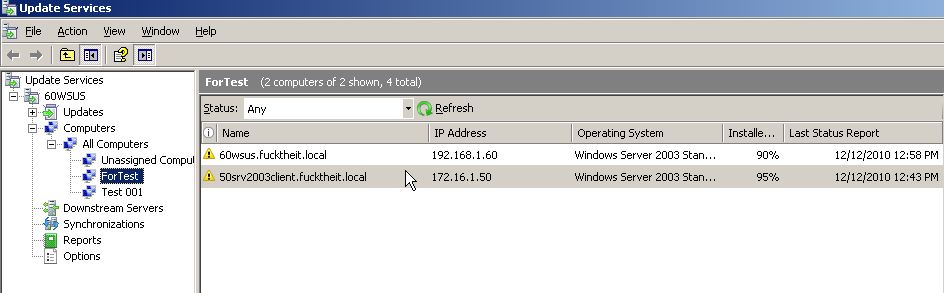
 4.WSUS Server部份,在all computer new group for test如下圖
 在option上做一些基本設置,要求client使用GPO
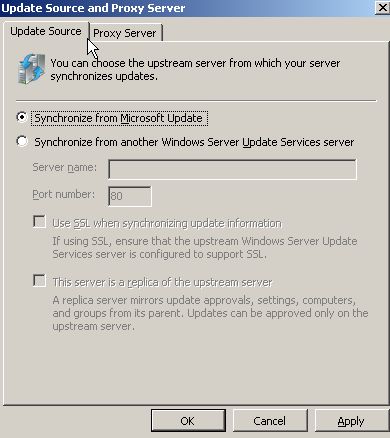
 一般環境使用synchronize from microsoft update 就可以, 使用autonomous mode就可以,如果想選用replica mode可以在這裡設置.
 如果在測試時遇到問題可以使用ClientDiag.exe(需要自己另外下載), 來做troubleshoot.如下圖
 5.最後就是對update後對應用的是否有影響的測試, 長期做戰....
使用monitor tool 來對系統的cpu , bandwidth , memory , application 來監控是否有影響
還有要留意event log的情況.
5.最後就是對update後對應用的是否有影響的測試, 長期做戰....
使用monitor tool 來對系統的cpu , bandwidth , memory , application 來監控是否有影響
還有要留意event log的情況.